> ## Documentation Index
> Fetch the complete documentation index at: https://docs.braintrust.ti.trilogy.com/llms.txt
> Use this file to discover all available pages before exploring further.
# Editing an Expert
> Update an expert safely without breaking existing user workflows.
If you are an owner or editor, you can update an expert after release.\
Use this guide for a safe change process.
For exact field definitions, use [Expert Fields Reference](/experts/expert-fields-reference).
## Open the Editor
1. Open the expert page.
2. Click **Edit Expert**.
3. Update fields and save.
## What You Can Change
* **Identity**: name, description, logo, about, images.
* **Behavior**: system prompt, hiring message, skills, categories.
* **Intelligence**: the AI model powering the expert — change it anytime from the **Intelligence** section in the Basics step. The platform default is **Claude Sonnet 4.6**. Admins can also select premium models (Claude Opus 4.6). See [model options](/experts/creating-a-new-agent#intelligence--model-selection) for the full list. For reasoning-capable models, you can also adjust the **Reasoning effort** setting — see [Reasoning effort](#reasoning-effort) below.
* **Capabilities**: hives, MCP servers, env overrides, synced Drive folder.
* **Automation**: trigger templates (cron/calendar).
* **Access**: visibility and permissions.
## Safe Edit Order (Recommended)
1. Update prompt/behavior first.
2. Validate in DM.
3. Then update tools/integrations if needed.
4. Re-test one real workflow end to end.
## High-Impact Changes (Use Caution)
| Change | Impact |
| ----------------------------- | -------------------------------------------------------------- |
| Removing hives/tools | Existing user workflows may fail immediately |
| Changing prompt significantly | Response style/quality can shift for all users |
| Editing trigger templates | New automation behavior may diverge from existing expectations |
| Changing visibility | Discoverability and access can change instantly |
## Common Mistakes
* Making multiple high-risk changes at once.
* Removing tools before checking who depends on them.
* Updating prompt and access simultaneously without testing.
## Reasoning effort
When editing an expert built on a reasoning-capable model (currently the OpenAI GPT-5 nano family), the **Reasoning effort** dropdown is available in the Intelligence section — the same control as on the create form.
For the full list of supported values and their meanings, see [Reasoning effort](/experts/creating-a-new-agent#reasoning-effort) in the create-expert guide. The value table and defaults are the same whether you are creating or editing.
Changing reasoning effort on an existing expert applies to future invocations only. In-flight or queued invocations are not affected.
## Connect or update the GitHub source repo
The **Source Repo** field is also available on the Edit Expert form, rendered by the same GitHubSyncField component as the create flow. It remains a **metadata-only** field — saving a URL here stores `sourceRepoUrl` on the expert record but does not by itself move any data between Braintrust and GitHub.
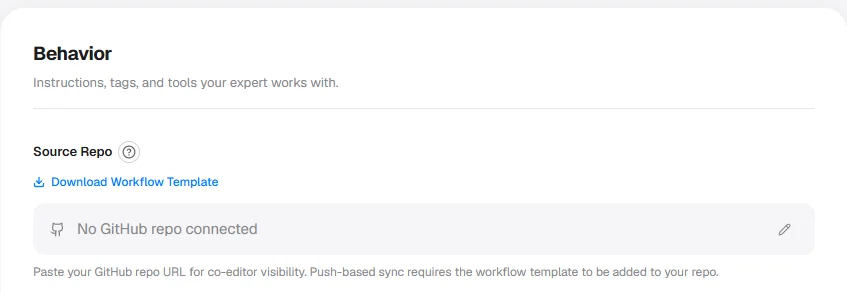 * **Set a repo:** enter the GitHub URL in the Source Repo field and save.
* **Change the repo:** replace the existing URL with the new one and save.
* **Clear the repo:** remove the URL and save to disconnect the sync.
The workflow-template download is available here too — if you have not yet committed the workflow file to your repository, download it from this field and add it to your repo. Once committed, the workflow runs sync **from GitHub into Braintrust**; this direction is uni-directional and Braintrust never writes back to your repository.
Edits made in the Braintrust UI are **not** pushed back to GitHub. Only changes committed to the connected repository (and processed by the workflow file) update the expert's prompts and skills in Braintrust. If you edit prompts or skills in the UI while the sync workflow is also active, your UI edits can be overwritten the next time the workflow runs.
For the accepted URL format and full field semantics, see [Connect a GitHub repo (optional)](/experts/creating-a-new-agent#connect-a-github-repo-optional).
## Next Steps
What every editable field does.
Control visibility and contributor roles.
Configure and troubleshoot credentials.
Build a new expert from scratch.
* **Set a repo:** enter the GitHub URL in the Source Repo field and save.
* **Change the repo:** replace the existing URL with the new one and save.
* **Clear the repo:** remove the URL and save to disconnect the sync.
The workflow-template download is available here too — if you have not yet committed the workflow file to your repository, download it from this field and add it to your repo. Once committed, the workflow runs sync **from GitHub into Braintrust**; this direction is uni-directional and Braintrust never writes back to your repository.
Edits made in the Braintrust UI are **not** pushed back to GitHub. Only changes committed to the connected repository (and processed by the workflow file) update the expert's prompts and skills in Braintrust. If you edit prompts or skills in the UI while the sync workflow is also active, your UI edits can be overwritten the next time the workflow runs.
For the accepted URL format and full field semantics, see [Connect a GitHub repo (optional)](/experts/creating-a-new-agent#connect-a-github-repo-optional).
## Next Steps
What every editable field does.
Control visibility and contributor roles.
Configure and troubleshoot credentials.
Build a new expert from scratch.